 |
| Before |
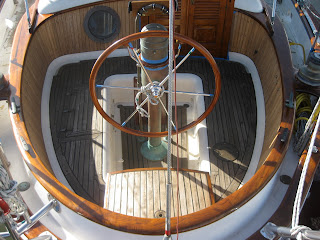
Happy Holidays! Sorry I've been so delayed with updating this, but with holidays around, I've just been so busy at work (I work as server at a local luxury hotel). We recently decided that it was time to do some motivating work on the boat, something that we could actually see and transform the look of the exterior. We were tired of not physically seeing the fruits of our labor, and we decided to do some brightwork. Frank has spent the past 2 weeks (while I've been at work) stripping the old
 |
| After |
nasty Cetol with a heat gun and scraper, and coating it with nice new Cetol. I had done a lot of
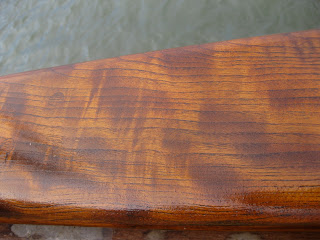
research on whether to go with Cetol Light or Natural Teak, and after reading all the raving reviews, I chose Natural Teak. I was a little worried because I had never seen Natural in person, and I was afraid it'd come out too dark, but I'm glad I decided to go with it after all because the color came out far less orange than Cetol Light. The job was time consuming (thanks Frank), but it was well worth it as it really made Moitessier gorgeous. We got lucky as some of the teak trim used is beautifully figured. It was a nice surprise as we couldn't see it before under the dark brown failed Cetol. We've done 4 coats of Natural Teak and it still needs a coat of gloss (hence the blue tape in the photos), but we are really happy with the results. They say you need 1 maintenance coat of gloss every 6 months to a year, so we'll see how it holds up.

 |
| Drool.... |

In addition to the brightwork, Frank also built a new table for our cockpit. The table is made from Purpleheart wood (the wood is actually purple, hence the name), and it was repurposed from a cutting board we bought a long time ago (from Marshalls) that was never really used because it would not fit in our sink when we needed to wash it. He also inset 2 cup holders, which we priced matched at $1.15 each, down from West Marine's outrageous $7.59. We try to avoid Worst Marine as much as we can, but for the little things that we don't want to have shipped, we go there and always price match as it really makes a huge difference in terms of savings.
 |
| Purpleheart...Cetol made it a little browner |
Another cosmetic upgrade was that we've added new fender covers. I've spent the past few days sewing these covers from Sunbrella material that we bought at a discount in the local second hand boating store called Sailors' Exchange. If you're ever in St. Augustine, you have to pay them a visit as they've got some great used stuff at a good price (be sure to haggle). It sounds like a trivial job, but adding these covers really changed the look of the boat. Aside from making it look nice, these covers also serve the purpose of protecting the fenders from the UV. One of our fenders had already started to deteriorate from the sun, making it so that the rubber was getting soft and rubbing off and leaving brown goo all over the side of the hull. This goop was really a pain to clean off, and we had to scrape it off every other week. I never thought that I would use my sewing skills outside of the fashion industry, but surprisingly, it's come in pretty handy. I've been offered many sewing jobs from people at the marina who have seen my work, so that's something to think about for our future cruising kitty.


