A while ago, we decided to start on the side deck-remodeling
project. In one of my previous
posts, I had talked about how our decks had a serious case of osmotic
blistering and how it delaminated the top layer from the decks. After much research, Frank decided that
the smartest thing to do would be to strip the delaminated layer, re-fiberglass
it, fair it, prime it, mark out where we wanted our non-skid, paint the wetted
areas with Awlgrip, and nonskid our panels with Kiwi grip.
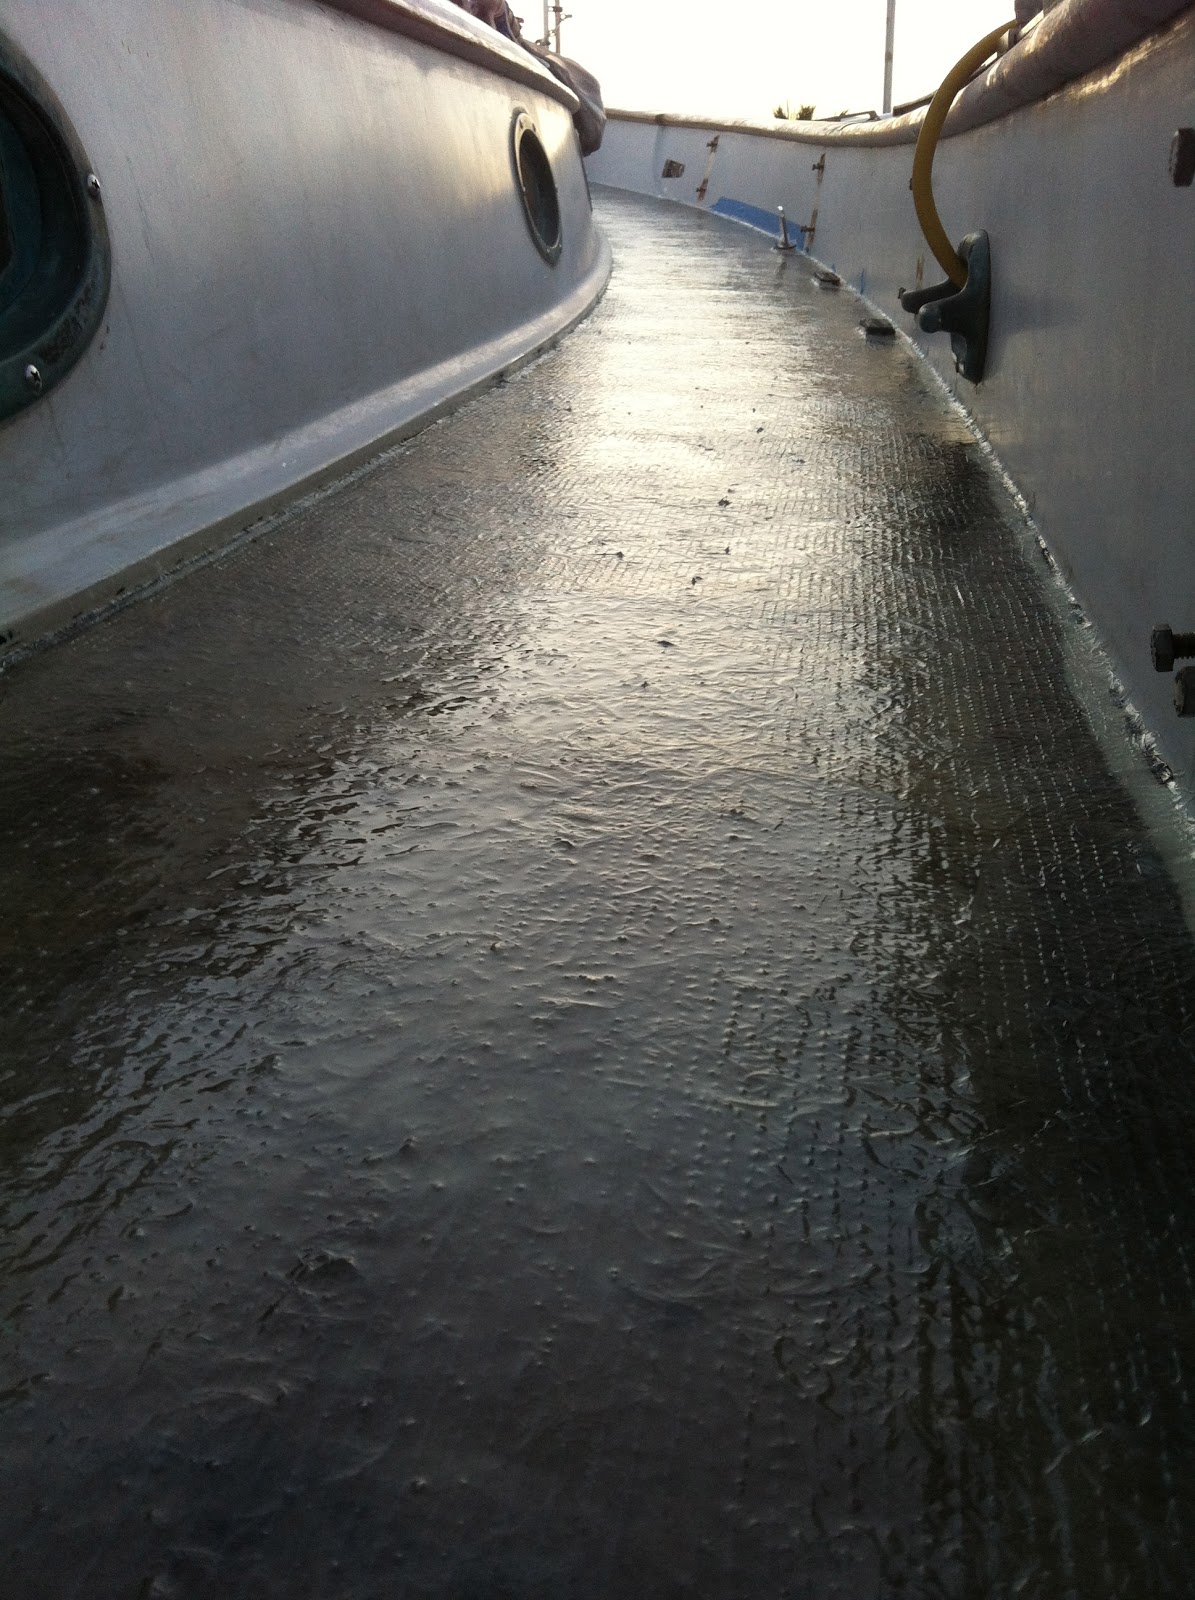
The first
thing that needed to be done involved removing the top layer of delaminated
chop strand. Frank used a 7” angle
grinder with a 30 grit disc and ground it down until it was good fiberglass. From there, we measured and cut out the 32oz fiberglass cloth so that that it could be laid in a solid sheet from
forward to aft on each side of the boat.
He then used West System epoxy to wet out the fiberglass. This was not
an easy task as he went solo on the mission (I was at work). After it had cured, Frank made risers
for all of our deck hardware to help elevate them from the deck slightly in
hopes to keep as much water off the joints as possible. He cut ¼” thick donuts out of
fiberglass board using a hole saw and epoxied them to the deck. Afterwards, we scrubbed it off with dish
soap and water to get rid of the anime blush. Anime blush is a side effect of epoxy curing that is often
waxy, and will gum up your sandpaper and also prevent adhesion between
layers. We then sanded it, and in order to make the decks smooth, we
used Interlux 404 two-part epoxy fairing compound. This product has a thick
marshmallow-ey texture and is easy to trowel. The entire deck was covered with this and from there sanded
down with a random orbit sander. We
then refilled the low spots with more fairing compound, and again more sanding. We did this about 4 or more times until
it was as smooth as we wanted. In
some of the more intricate areas, we hand-sanded and to be honest, once you get
into it, it’s a lot like sculpting.


To seal in the fairing compound, we had to prime it with Interlux two part Epoxy Primekote. This was the most annoying portion of this project as it had was heavily reliant on the right weather. With this product, the substrate temperatures had to be between 50º and 85º and the ambient temperature no more than 95º with a 10 to 12 hour cure time within these temperatures. Not only that, but the humidity had to be below 80%. In Florida, having perfect conditions like this is like seeing a shooting star, it happens, but rarely. If it’s not too hot out, it’s humid, if it’s neither, it’s raining, if not, then dew forms early, and so on. Another one of those boat things, I guess. In order to try and beat the system, we opted to prime the boat in sections so that we would have enough daytime conditions for the stuff to properly cure. Waiting sometimes for a week or two for the day without a chance of rain, just to get a section done. When we finally did get the right conditions, we had to shade off the areas of the deck so that the sun wouldn’t heat up the substrate too much. We learned this the hard way when we tried to prime the bow without shading it and the product kicked almost instantly, leaving heavy messy brush strokes everywhere. From then on, we made sure to tarp of the areas before priming and also measure the temperature of the substrate before applying any primer. This is going to sound ridiculous, but what also helped it from getting too hot was holding a beach umbrella over the area, as Frank rolled. I felt a little silly, but it really helped! Once we got the technique right, we primed the first coat, let it cure, and again, sanded with 80 grit paper. A lot of this was done by hand as the orbit sander was too strong and took off too much primer. We then put another coat of primer, waited for that to cure, sanded AGAIN, and marked out where our non-skid patterns would be. Frank, once again, ingeniously created a device that would allow us to trace out an even 1” edge all along the non skid. What he did was cut a semi-circle, measured the radius 1” from the edge, and poked a hole so that that you could insert a mechanical pencil and run it along the curved edges and get an even measurement all around. We measured and marked out where each panel would be and taped out all the edges to be painted. The taping took about 6 hours made quicker by the fact that Frank cut a roll of tape in half and precut the radius so that it was just a matter of peeling and sticking the tape anytime we had a round edge around a corner. We did this the day before we planned on painting as we knew that we needed to start early to beat the dew.


The next
day, we went to paint and noticed that dew had ruined some of the tape, and it
was in the process of removing this soiled tape that our day got even
better. Apparently, the second
layer of primer didn’t adhere to the first, and it started coming up with the
tape! That really, really sucked
and we have decided to postpone the painting until the spring as winter
temperatures set in and acceptable days for painting become fewer and further
between. We are moving on to other
projects and will hopefully finish the rest when the right weather comes.