I would like to say that we are no longer an elevated trailer! We stepped our mast yesterday, and boy it sure feels good to be a sailboat again. Well, at the very least, we are a trailer with a very big antenna, but Moitessier is looking pretty fine. The crane came at 10am yesterday morning. With the help of the yard, the stepping itself went very smoothly. I guess there is a new law in Florida now where only the people working at the yard can be involved in stepping the mast. It's a liability issue that Frank was not too happy with at first, but after sitting back and watching 5 guys do a job that we would've had to do on our own, he was pretty pleased. It took all of 40 minutes from start to finish to get the mast up. John, the owner of the yard, said that it was the quickest mast stepping that they had ever done. This, no doubt in part, was due to Frank's anxiety fueled prep work the day before.
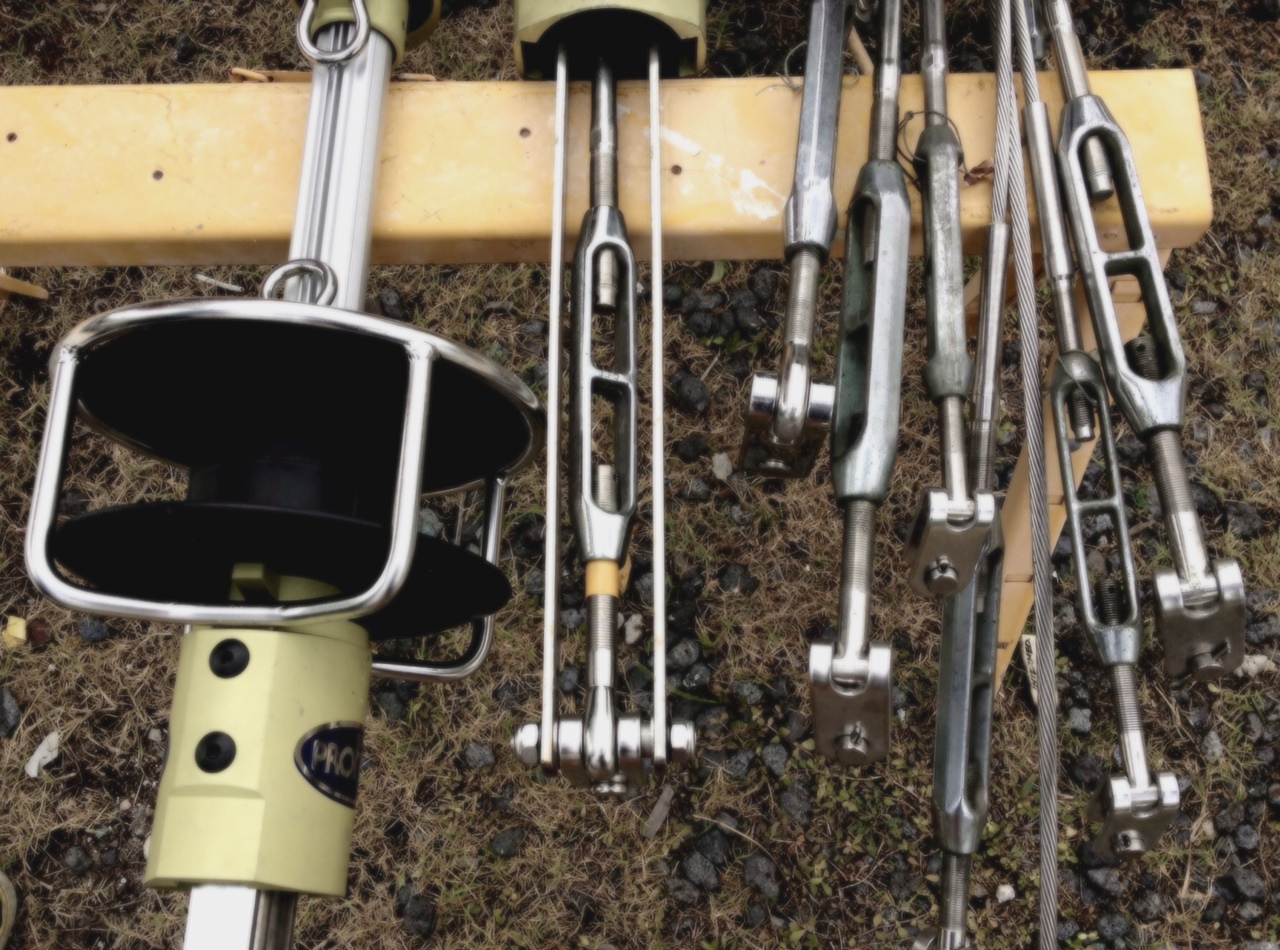
The day before the stepping, we tied all of the rigging to the mast with the halyards, making sure that nothing was tangled and placed it so that it could easily be attached to its corresponding chainplate. The roller furlers were snuggly lashed to the mast as well, and all of the clevis pins were in the lower toggles, with the cotter pins placed so that they could be removed by hand. We also cut the wires to length and zip tied them in neat bundles to facilitate an easy run down the compression post. We had also run string tracers down through the boat so that the bundles could be easily pulled through. On the spreaders, we used Monel seizing wire to secure the upper shrouds to the tips. We had everything ready to go including our "gold" coin at the base and had mentally walked through the stepping procedure together to ensure smooth sailing. When the time came, all they had to do was lift the mast, get it on the boat, Frank pulled the wires through, and we all jumped in to get the stays and shrouds loosely secured. A good tip is to wrap the ball and lifting hook on the crane with some towels or rags so you don't scratch the paint on the mast. We also left our windex and anemometer off so they wouldn't be damaged in the process. So I have the pleasure of going up the mast at some point to install these. Now, it's a just a matter of tuning the rig and getting mast straight :)

 |
| Everything tied together |
 |
The "gold" coin that Frank found in Orlando
with our friends on the Gremlins Hammer. |
Backtracking a bit, a week ago in preparation for this big day, Frank assembled our roller furlers. The staysail roller furler was re-used from the jib and we bought the jib furler brand new from the Miami Boat Show last season. When we first bought Moitessier, the staysail furler was completely shot, owing to the fact that the lower bearings had exploded. The furler was continuously used, thereby chewing up the lower drum, thus preventing us from installing new bearings. Stupidly enough, buying a replacement lower drum was as much as it was for a larger furler as the parts were discontinued. Go figure. We used the larger Profurl NC-42 from the jib on the staysail, allowing us to remove some of the broken bearings and damaged extrusions, as the staysail stay is significantly shorter than the jib stay. Upon assembling the new roller furler, also a NC-42, we discovered that the parts they had give us were ever so slightly too short for our application. The stock parts come in 50 ft, what we needed was 50 ft 5 1/2 inches. Here's the issue, the top of the unit requires a top bearing that goes all the way inside an extrusion (the tube that fits around the stay) its full length, the extrusions are attached to each other using a bearing that goes halfway into each side. Because the bearings themselves are 4 3/4", this made it impossible to get our required length by only cutting one extrusion. The problem with cutting 2 is when you butt them together with a bearing, they have 2 pre-drilled and tapped holes for set screws that correspond to 2 holes in the bearing itself. Drilling and tapping these was a bit of a challenge. What Frank did was, he cut apart one of the end sections of tubing that had the set screw holes in it and used them as a drill guide. This allowed him to accurately drill the holes after cutting up the 2 extrusions, and from there it was a matter of lightly sanding the tube ends to make them square so they would butt together precisely.
 |
| Sanding the extrusion ends |
 |
| Makeshift drill guide |


I'm glad to see the coin again. You guys are making great progress.
ReplyDeleteThanks for the words of encouragement. Day by day we are slowly knocking things off the list. We are finally beginning to see the light at the end at the tunnel which is really exciting. It's only a matter of time now.
Delete