Friday, December 30, 2011

Merry Belated

Sorry it's been a while since I've updated.  Been hard at work waitressing for the holiday season. It's supposedly the most lucrative time of year, so of course, I had to get in on that action.  As I've been at work, Frank's been getting into the holiday spirit and decorating with Christmas lights.  Well, kind of...

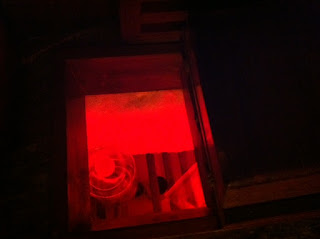
Our refrigerator was the Grinch that stole Christmas only instead of stealing toys, it stole our butter, cheese, and anything else that happened to disappear into its dark cold recesses.  We would find food barely recognizable months after we bought it, simply because we would forget that it's there.  Out of sight, out of mind.  As a matter of fact, shortly after moving aboard, we found a 4 pack of butter and a hunk of cheese rotting away in the there.  They weren't even from the US, and the expiration dates were over 2 years past due.

Frank decided that he was sick and tired of groping in the dark, and so he installed Red LED Rope lights (Red so that it won't ruin our night vision when we go for a snack during watches) along the top edge of the fridge.  They are turned on and off with a rocker switch and we will soon install a small DC fan to better circulate the cold air.  The rest of the boat may be lacking holiday cheer, but our fridge certainly looks and feels like Rockefeller Center.  The hardest part was running the new wire for all of this, and the total cost was about $30.  The power consumption is minimal, but the satisfaction of knowing what you're getting when you're reaching in the back of the fridge is priceless.


Sunday, December 18, 2011

Boat Bling

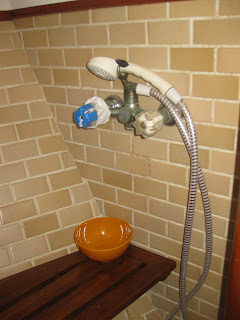
Moitessier has many different personalities, sometimes she's nurturing and motherly, taking care of us when we need her; at her best, she's strong and fearless; her worst, stubborn and finicky.  Occasionally, she's downright diva.  She has no problem letting us know what she wants and when she wants it.   Moitessier hasn't learned English (thankfully so, because Frank has definitely said some mean things about her lately),  but this does not prevent her from getting her point across.  She let us know, in no uncertain terms, that no dress up is complete without some fine, shiny jewelry to go along with her new Cetol outfit on deck.  She made her request heard by "developing" a leak in her shower fixture.  Mind you, we've never even used this shower (we use the one at the marina...too much condensation, see previous post).  So being the spoiling parents that we are, we bought her a new faucet (we didn't really have a choice), made of solid brass.  That's like the platinum of boat jewelry.

Before.  Notice the blue tape, that was
our way of delaying the inevitable
After
Pretty :) 
Luckily, we were able to find one the exact same size as the older one.  The fittings used to connect it to our water system appear to be custom machined as they were all in odd sizes.  The fixture itself is made for iron claw bathtubs, and it's really suiting to the overall decor of Moitessier.  Our older one appears to be of a similar make (not as pretty), but it did not include a spout.  We decided to leave the spout on as it would be a very good way to fill up a bucket of fresh water (if we ever need to do so).  The biggest pain to this (as no project is as straight forward as it should be) was getting the older fittings to seal up properly.  Plumbing is not something Frank enjoys or is very good at, but as usual, he's learning as he goes.  At the same time, we figured it would be prudent to replace the shower sump hose as well so off it went.

Thursday, December 15, 2011

Unwanted guests

Notice the white streaks of MOLD

Boats live in a hostile environment, their job on the most simplistic level is to keep water out.  Water is cunning though, it always manages to find its way in in spite of our best defenses.  Whether through drips and leaks, trickles and droplets, or as we recently discovered... the air, water always finds its way in. As the temperature outside starts to fall, air's ability to hold moisture falls along with it.  This is what people are talking when they're referring to the dew point.  When living aboard, this becomes complex as the air inside of a boat is kept artificially warm for your comfort.  When that warm moisture laden air reaches the cooler sides of the hull, its temperature is forced down and the moisture is forced out, thus causing condensation.  Add to that, a restricted air flow in areas such as lockers, cabinets, anywhere where there is poor ventilation and you then have the preferred berth  for our newest crew member-Mold.  We were recently introduced when we begain digging out our winter clothes from our locker and discovered Mold and his friend Mildew hanging out in the back.  Frank had long forewarned of their coming, but I refused to believe that anyone could crash our party. Upon further investigation, it turns out they had the nerve to invite their whole extended family to stay in other parts of our boat as well.  It was time for action, we needed these freeloaders out before they forced US out.  So, out comes the computer and research on how to evict these unwanted guests.  We found a very good article that we thought we should share with anyone who finds themselves in the company of these free loading vagabonds.

Turns out the things they like least are Lysol (our strongest ally), Bleach water, and just good ol' Ventilation and Sunshine.  I emptied out all of the contents of each cabinet, locker, and pantry, wiped it down with bleach water and then sprayed thoroughly with Lysol.  With the clothes, I put them out on deck and let the Sun do its job.  Afterwards, I let the empty lockers air out before putting everything back in.  So far, it's been about a week and it doesn't seem to be coming back.  I've also been more weary of keeping things ventilated and opening the lockers up whenever I think of it.  As well we've invested in a dehumidifier which, to my surprise, has pulled at least 30 pints of water a day from the air inside the boat!  The dehumidifier was designed for the basements of 1000 sq ft homes, so you can compare that with the inside of a boat, and that's a lot of moisture.  It makes sense since we are living pretty much underwater, something we don't always think about.  The only down side to the dehumidifier is that it requires shore power, but for now we feel that it's a pretty good investment.  

Die, Mold, Die!

Saturday, December 3, 2011

Heads Up-Part I

Frank recently made a smart trade with one of our live aboard neighbors at the marina.  For a while now, we've been complaining about our electric head and wanting to swap it out for a Lavac manual unit.  We were holding off on buying one because of finances, but as luck would have it, our neighbor was in the market for an electric head (he's got 2 heads, and he wanted one of them to be electric).  It turns out that he had a Lavac unit, the exact one that Frank was considering so it only made sense to make the trade.

Before installing the new toilet, we decided that we needed to replace all of the old, crumbling head hoses.  They were essentially exhaust hoses that were clogged with well.....shit (sorry, I refuse to use the word "poop") and calcified urine.  To illustrate just how badly they were clogged, picture the inside diameter of a 2" hose having mounds of calcified urine clog it so bad that the opening is now around 1/2" in some areas and completely clogged in others.  The job of removing these was, to say the least, REPULSIVE.  It involved using a Shopvac to suck out whatever liquid remained in the hoses to avoid "leakage" all over our bedroom.  The ends were then plugged with paper towels and wrestled from their confines and deposited into doubled up trash bags.  I shamefully admit, I behaved like a complete princess and did not join in the festivities.  In fact, at one point, I was retching so badly that Frank scolded me and told me to "get the hell off the boat and sit in the cockpit" (which I gladly did).  When I finally returned to help, I could only do so with wads of wet paper towels shoved up my nostrils so that the smell wouldn't reactivate my gag reflex.  I don't know how he did it without vomiting, but I can assure you there was a lot of swearing and dry heaving involved.

Look of pure disgust
The cherry on top of this chocolate cake was when Frank went to remove the last hose off of our holding tank, the fitting on the tank broke in half, thus spilling about 10 gallons of liquid shit (that's not even ours) into our bilges.  This happened because when the holding tank was replaced (in Mexico), they fabricated the elbow fitting from a fiberglass tube cut at 45 degree 
angles and merely glassed together with a thin layer of woven cloth.  The force applied was very minimal (he even cut the hose with a blade to facilitate removal), so you can imagine the look of surprise, horror, and inevitable disgust on Frank's face when it tore off in his hand. The glop-glop-glop sound of raw sewage spilling into our bilges accompanied by the smell of pure evil will remain a smear on my fragile mind.  Mind you, we did have the forethought, to have our holding tank pumped out and rinsed 3 times before this, but of course, 10 gallons still managed to remain (and seemingly no less diluted at that).  We had to vacuum out our bilges, fill it with about 1/2 a bottle of Soft Scrub, let it sit.  Vacuum again, and so on and so forth.  Of course, when we went to vacuum this, the Shopvac being just as repulsed as us decided enough was enough, and started spewing its contents from its exhaust (yes, that's right, even our vacuum was puking on us).  Frank, being as lucky and chivalrous as he is, managed to protect our brightwork from the brunt of this with his face.  He even got to taste a little of this goodness, when it sprayed into his mouth.  Yummy...

Moral of the story...no matter how much you prepare for this project, No matter how many other horror stories you hear and how hard you try to avoid it, YOU WILL most definitely end up covered with shit.  This is just the cosmic joke that Poseidon likes to play on boat owners.  There is no way to circumvent it, in fact, it seems the more you try, the worse you'll have it.  So for anyone reading this and contemplating this project, our advice to you is to keep lots of spare paper towels (not the cheap ones....go for the Bounty) handy to wipe up the shit, vomit, piss, and tears from everything around you.  

Broken fitting on holding tank
Notice the thin layer of fiberglass 

Sunday, November 27, 2011

Playing Dress Up


Before

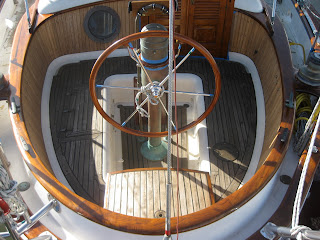
Happy Holidays!  Sorry I've been so delayed with updating this, but with holidays around, I've just been so busy at work (I work as server at a local luxury hotel).  We recently decided that it was time to do some motivating work on the boat, something that we could actually see and transform the look of the exterior.  We were tired of not physically seeing the fruits of our labor, and we decided to do some brightwork.  Frank has spent the past 2 weeks (while I've been at work) stripping the old

After
nasty Cetol with a heat gun and scraper, and coating it with nice new Cetol.  I had done a lot of
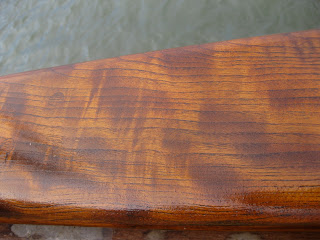
research on whether to go with Cetol Light or Natural Teak, and after reading all the raving reviews, I chose Natural Teak.  I was a little worried because I had never seen Natural in person, and I was afraid it'd come out too dark, but I'm glad I decided to go with it after all because the color came out far less orange than Cetol Light.  The job was time consuming (thanks Frank), but it was well worth it as it really made Moitessier gorgeous.  We got lucky as some of the teak trim used is beautifully figured.  It was a nice surprise as we couldn't see it before under the dark brown failed Cetol.  We've done 4 coats of Natural Teak and it still needs a coat of gloss (hence the blue tape in the photos), but we are really happy with the results.  They say you need 1 maintenance coat of gloss every 6 months to a year, so we'll see how it holds up.


Drool....


In addition to the brightwork, Frank also built a new table for our cockpit.  The table is made from Purpleheart wood (the wood is actually purple, hence the name), and it was repurposed from a cutting board we bought a long time ago (from Marshalls) that was never really used because it would not fit in our sink when we needed to wash it.   He also inset 2 cup holders, which we priced matched at $1.15 each, down from West Marine's outrageous $7.59.  We try to avoid Worst Marine as much as we can, but for the little things that we don't want to have shipped, we go there and always price match as it really makes a huge difference in terms of savings.


Purpleheart...Cetol made it a little browner


Another cosmetic upgrade was that we've added new fender covers.  I've spent the past few days sewing these covers from Sunbrella material that we bought at a discount in the local second hand boating store called Sailors' Exchange.  If you're ever in St. Augustine, you have to pay them a visit as they've got some great used stuff at a good price (be sure to haggle).  It sounds like a trivial job, but adding these covers really changed the look of the boat.  Aside from making it look nice, these covers also serve the purpose of protecting the fenders from the UV.   One of our fenders had already started to deteriorate from the sun, making it so that the rubber was getting soft and rubbing off and leaving brown goo all over the side of the hull.  This goop was really a pain to clean off, and we had to scrape it off every other week.  I never thought that I would use my sewing skills outside of the fashion industry, but surprisingly, it's come in pretty handy.  I've been offered many sewing jobs from people at the marina who have seen my work, so that's something to think about for our future cruising kitty.

Tuesday, November 15, 2011

The Leak

Frank's very good at tracking down and fixing what few leaks we have ever had every time it rains.  The only one that has alluded him, up until now, has been the one in our workroom.  Well, I wouldn't exactly call it a leak,  it was more of a seep which would only make a guest appearance during extremely heavy downpours, and even then you'd only notice it if you ran your fingers along the trim on the doorway.  Tracking it down proved to be a prime example of the snowball effect of boat projects.  Frank began by removing the related bungs to get to the screws, to remove the piece of trim where the leak was visible.  This allowed him to see, ah, there were wires coming through and it was running down them.  On a side note, the only way he was able to see up in the tiny space was using his iPhone on video mode with the flash on.  Because the camera is located so close to the edge of the phone, this allowed him to squeeze it into the tight space and view it on the iPhone screen.  We've used this method several times with other projects, and it's proven to be very effective.  A regular digital camera sometimes isn't quite small enough.

Since it's bad practice to plug a leak from inside, the source of the wires had to be established.  Ok, easy enough, the only electronics in that area, were the instruments in the instrument panel.  Getting to these proved to be more difficult, there is an access panel behind the instrument turtle but it only allowed a small child's hand to fit through....so, apart comes the panel.  Easier said than done, in the end, Frank ended up having to disassemble, rebuild, and re-bed the whole thing, using new screws and messy, black 3M 4200 for added strength and waterproofing.  Not only that, but the job required a plethora of tools-for everything from extracting broken screws, re-drilling pilot holes, caulking, gluing, cutting, etc.  It's amazing how much goes into fixing a "small" problem.  If left unchecked, small problems will inevitably turn into big ones, requiring twice as much effort and money.  Frank's mantra revolves around preventative maintenance...STOP all leaks.  I can proudly say, we're totally leak-free...for now.

These were all the tools used


Thursday, October 27, 2011

Compression Test


After cleaning and repainting the engine, we finally got around to digging a little deeper in determining its current health. Our engine is a 1983 Mercedes 616 (same engine as on the 240D car) that's been marinized by Nanni, and it's got about 5900 hours on it so it's getting on in age.  We were worried that it was on its way out, though other than our overheating issue, it's been running fine.  So to get a better idea of the life that's left in it, we opted to do our own compression test.  

Specially bent wrenches
Before a compression test can be performed, it is required that the 
In use
valves be properly adjusted.  Unfortunately, this required special wrenches that fit in the tight spaces.  Mercedes and other companies make these special valve adjustment wrenches, but they go for over $100 a set.  With a little heat, a pair of 14mm long handled wrenches, some silver solder, and scrap pieces of pipe, Frank was able to save us the money by bending us a set of our own.  Times like this is when our workshop and it's built in vice really come into their own. Good thing we went through all of this as every one of the 8 valves were grossly out of spec.  The adjustment was a fairly straight forward job and we replaced our valve cover gasket at the same time.  

Then it was onto the compression test.  We had bought a US General compression tester that had a special fitting that goes in place of the fuel injector; our results were: 380, 350, 390, 340 psi with a total of approximately 13% between all 4 cylinders.  We were all smiles...why?  Well in english, this means that the engine is in "Good-Excellent condition."  A brand new Mercedes 616 engine would have a compression between 375-425.  Also ideally, the difference in compression between each cylinder should be around 10%, so that was GREAT news.  Not bad for a 28 year old engine with nearly 6000 hours that's the aprox equivalent of 295,000 miles.  We had heard that the 616s can go for up to 10,000 hours before a rebuild, but we were skeptical until now.  As a comparison, most Yanmars can get around 5000 hours before a rebuild.  

Nice
Lacking a terminal diagnosis, we decided it was time to go ahead and spruce our old lady up. Frank replaced all the fuel lines, 50 ft in total, labelled their shut off valves, installed dual in-line Raycor fuel filters, replaced all return lines, and installed a new/better designed lift pump. At the same time, he improved upon our engine access by cutting an inspection door into the back of our settee that covers the engine. He installed hinges that come apart so we can remove the entire door (I thought it was pretty clever). This allows us to change the oil, oil filters, fuel filters, and access the seacocks without having to move around our whole settee (very heavy!)

Before


After

Engine Access

We are now waiting on a set of fuel injector nozzles and to run a diesel purge (which supposedly helps to break up carbon deposits in the cylinders).  Next on our engine list is figuring out why all our coolant keeps disappearing.  There is obviously a leak somewhere...one step at a time.

If all of this wasn't enough, while everything was already apart, we also replaced our refrigerator pump.  It appeared to have been a cheap Home Depot-esque pump designed for fountains and landscaping water fixtures.  As you can guess, it didn't hold up very well in our marine environment and was leaking from the body as well as growing us a beautiful salt sculpture.   Though we can appreciate good art, artists don't make good pumps, so the lazy bastard had to go. We now have a proper March pump designed for our fridge in its place.  

Tuesday, October 18, 2011

Cumberland Island


Just got back from a sailing trip to Cumberland Island.  No, unfortunately, not on our boat :( it was a great sailing adventure nonetheless.  Martin, the guy we sailed with from Bermuda to NY, invited us along last minute for a weekend sail up there on his Hunter 41.  The itinerary: Left early Friday morning, sailed all day about 15 miles offshore, docked in Amelia Island around 8pm, spent the night there and got up early for an hour sail to Cumberland Island.  We spent the day on the island and left around sunset for a night sail back to St. Augustine.  Ah...night sailing...one of my favorite things.


We spent the day on the island exploring the secluded beaches and live oak forests.     There were wild horses on the island (what Cumberland is known for), and seeing these majestic creatures in the wild grazing on the grass and spanish moss was awesome.

The weather was spectacular and it was so nice to be
out on the ocean again.  There is a certain tranquility I feel out there that is indescribable, I feel so at peace...Coming back has definitely put a fire under our asses in getting this boat ship shape.  It's reminded us of why we are going through all of this hard work and frustration...now we just need to figure it all out.


Monday, October 10, 2011

Worrisome Windy Weather on the Water

Right now, we are in the biggest storm we've been in since we've bought the boat.  A Nor'easter combined with a tropical low forming nearly on top of us to be be exact. I've never been so aware of nature's impact during a storm as I am now.  I have taken it for granted all my life because I've always lived on land, in a house or an apartment, safely nestled in my bed or watching TV on a couch, completely oblivious to the forces of nature.  Totally different on the water.  The past couple of days, we've been having sustained 35 knot winds with 50 kt+ gusts, and the sound this makes on the rigging is indescribable and terrifying.  Couple the sinister howling with the intermittent downpours bulleting down on our cabin-tops and the rocking of our boat...all of this makes you hyperaware and very respectful of Mother Nature.  Frank and I have not been sleeping soundly the past couple of nights, going in and out of sleep, subconsciously listening for any peculiar sounds that may signify a dock-line breaking or anything else that would threaten our home.  Being on a boat, you are vulnerable to so many elements of nature, and feeling the direct impact of her is terribly humbling.


It's been a nerve wracking month, in this sense, because we've had a few close calls with hurricanes, and being from up north, these things are pretty scary!  Especially when they threaten to take your boat and everything you own along with it.  Hurricane Irene, ironically enough, missed us and hit NY, which is crazy because we all know that NY doesn't frequently get them.  With these fears in mind, we have put off removing any stays or chainplates until we are clear of this dreaded season.  Another delay, but better to be safe than sorry.

Irene


While we are on the topic of the scariness of losing our home, our condolences goes out to the crew on Dolphins, a Hans Christian 33. Their boat recently caught on fire, burned to the waterline, and sank while they were anchored in Spain.  Luckily they made it off safely, but our hearts break for them, as they lost everything with it.  For details, check out their blog listed on the right, under "Le Grand Voyage."

Thursday, October 6, 2011

Osmosis not just for cells and hulls


We finally have a better idea as to what is going on with our decks.  As originally suspected, and after discussing this with numerous people on the forums and through deductive reasoning we have come to the conclusion that it is, in fact, osmotic blistering.  This only makes sense if you look at all of the symptons:

1)  When we pulled up the old Plasteak, 90% of the glue holding it down had failed.  Coincidentally enough, the areas where the glue adhered best tended to read lowest on the moisture meter.

Notice glue adhere to the left panel and not the right

2)  There are clearly defined lines of crazing in the gel coat corresponding to with the seams of the original teak decking.


3)  We have found several areas of de-lamination, between the top layer of chopped strand mat and woven substrate, that also correspond to the areas where the seams failed.  In these areas areas, there is clear discoloration underneath the failed gelcoat.


4) After puncturing these sections of discoloration/blisters, we have also found that they contain osmotic fluid, which is easily identified by its strong, sour smell.  Kind of a dead giveaway from here....


This happened, more than likely, when the seams on the original teak decking failed and were not re-caulked quickly enough allowing water to remain trapped against the surface of the decks.  This is often times a common problem on the underwater portion of sailboat hulls, and is rarely found on the decks.  Lucky us...:(  The next step is to remove all the gel coat and areas of delamination and  allow it to dry, from what we understand, this could take anywhere from a couple months to a year.  Our plan is to closely monitor the drying using a moisture meter and marking out the readings in a grid pattern on the deck.  Once it's dry enough, we can proceed to fairing, barrier coating, and repainting.  I can't wait!

Wednesday, September 7, 2011

Screwed by Crevice Corrosion...

Time keeps flying and my desire to procrastinate hasn't gotten any better.  Frank finally received his HVAC license today.  For those who don't know what that is, it's a required license to work on refrigeration and air-conditioning units.  He's been studying with a friend from the marina, setting up weekly study groups to encourage each other to stay on top of reading and learning.  The idea behind this is two-fold.  One is so that we aren't reliant on someone else to fix our systems, and the second is so that he could potentially pick up work fixing up other peoples' systems while we cruise.  From what we understand, refrigerators and ACs are heavily relied upon and are frequently failing on boats.  This is a huge accomplishment for us for if he took a class at a trade school, it would've cost around $15K.  He was able to pass the test by studying the trade school textbooks and doing some hands on practice on old, used marine refrigerators.  I'm quite impressed; I can't learn from books!


Aside from that, we have been working on smaller projects in the past couple of weeks.  We have replaced one more chainplate and stay, and have even gotten our long awaited custom chainplate bolts.  Yes!!  As I'm writing, I'm realizing I had never posted this issue on our blog.  When we were removing our chainplates, we were finding the bolts to be in such bad condition due to crevice corrosion that you could literally tap them on a hard surface and they would fall apart.  Really scary!  Crevice corrosion has been haunting our dreams from the very start of our boating adventure.  We first encountered this nautical pandemic on our steel boat, where the stainless fittings would look sparkly new, only to randomly break on us, under very light loads.  Crevice corrosion happens when stainless steel is in a moist environment deprived of oxygen.  This generally happens where a fitting passes through a deck, or some other structure.  Anywhere where the stainless is exposed, inevitably, stays looking fresh and new, where it's deprived of oxygen, it actually turns into a sponge-like structure.  The steel corrodes out leaving only nickel behind.  This is why it's often recommended that the maximum lifespan of rigging on a boat is 10-15 years.  Couple that with the fact during the time of manufacture, Hans Christians in general, used stainless steel of inferior quality made in what people refer to as backyard foundries, which had nowhere near the quality control of their American counterparts.  This is a major issue with Hans Christians and Taiwanese built boats as a whole.  For the most part, this topic in the boating world is quite taboo.  A lot of people refuse to be believe that that shiny stainless bolt-head could be nearly corroded through right beneath the surface.  Out of sight, out of mind, I guess which to me is absurd as we are a floating case study of how stainless fails.  Anyhow as we went looking for replacements, we found that once again, these bolts were not available off the shelf and they had to be custom made.  We went with Fastenal, a nationwide hardware company, and worked with the salespeople to have a new set custom machined.  Of course, not surprisingly, the first time was not the charm.  Long story short, after an extended wait with the first set being totally wrong and sent back, we finally have the new ones on hand.   Thank God we don't have to worry about bolts for a long time.  


Crevice corrosion...

Not good..

Sooo pretty!

One week's salary :-(


We have also recently tackled the job of repainting the chain locker.  We had put this off for a while because we didn't want to have to crawl into what we call "the dungeon," and get fiberglass all over us, but we finally manned (or womanned) up and got it done.  The reasoning behind this was not solely cosmetic, but serves the purpose of allowing us to see any new leaks that may develop and basically track any water intrusion.  It was a good opportunity to look over our ground tackle and see the condition of our chain.  Some of which is, unfortunately, unsalvageable.  Another thing on the shopping list :(

Before

After

Wednesday, August 10, 2011

Making friends with our Benz

Frank finally decided to tackle the engine a few days ago because we were having some overheating issues.  He spent 2 days thoroughly going over the engine, scraping loose paint, treating areas of rust with Ospho (great stuff!), and detailing it.  He also changed the oil, oil filters, fuel filters, replaced all the zincs, sourced spares, changed the coolant and cap, and repainted the whole engine.

Partial blockage in transmission oil cooler 

All of the debris from the raw water side

At the same time, he removed the alternator, which had seized and attempted to rebuild it, however it was futile as it ended up being beyond repair.  A new Balmar alternator has now made it onto our shopping list (ouch!).  In the meantime, to address the overheating issue, he started at the beginning of the raw waterline, disassembling and checking as he went.  First problem he found was in the transmission oil cooler, which no longer had a zinc left in it (probably due to the fact that replacing it meant standing on your head in the bilge).  He replaced the zinc and cleared blockages that had developed inside the cooler.  As you can see from the photo, there was quite a bit of buildup in it.  Some of the debris made it down the line into the engine oil cooler, blocking some of the tubes in the heat exchanger.  Although we can't start the engine until we install a new alternator, as the belt on the alternator also runs the fresh water pump; we believe that these are some of the causes of overheating.  He also installed an expansion tank, which was missing and also the cause our corroded alternator (when the coolant boiled over it poured all over the alternator, ruining it).   We now have a nice, newly painted engine to start from scratch on.  Any leaks can now be easily spotted and remedied.  Still have some work to do, but at least we're off to a good start.


Before


During

After